| What it is | a board that holds, powers and transports your pedals as one rig |
| Core parts | board, pedals, power supply, patch cables5 |
| Power | an isolated supply gives every pedal its own dedicated power source6 |
| Chain order | dry pedals early, wet effects late7 |
| Noise fixes | filtered and regulated power, isolation, buffers, noise reduction68910 |
A pedalboard is a board that holds your effects pedals in a fixed order, powers them from one supply, and carries the whole rig as a single unit. Instead of plugging pedals together on the floor before every gig or rehearsal, you wire the chain once, mount the pedals, and carry one case. For a player with more than two or three pedals, a board turns a pile of boxes and cables into an instrument you can set up in minutes.
Players build boards for different reasons. Some want a tidy, quiet rig. Some want a specific sound. Dave Navarro's Jane's Addiction board was deliberately built from pedals obtainable at any Guitar Center anywhere in the world, so it could be rebuilt on the road1. Others build their own: Killian Gavin had his board custom built by his best mate, a builder and guitarist2, and an Origin Effects reader named Daniel made his own board, designed with room for specific pedals and an aluminum box filled with plectrums3. Companies such as Free The Tone built custom pedalboards on commission for many professional musicians, and shaped its own ideal pedalboard from that accumulated know-how4.
What a pedalboard is made of
Every board comes down to four things: the board itself, the pedals, the power supply, and the cables that connect everything.
The board. Boards range from simple flat plates to powered units. The GOKKO GK-55 is an example of a pedalboard sold with a power supply included5. Some makers offer modular systems you design piece by piece, and Aclam Guitars publishes a step-by-step guide to choosing sides, tracks, feet and fasteners when building a custom board. Aclam also points players to Pedalplayground, a free tool for designing guitar or bass pedalboards by choosing from a wide selection of pedals11. Planning the layout before you buy anything is the cheapest way to avoid a board that is too small.
The pedals. What goes on the board depends on what you play. A typical chain covers gain (overdrive, distortion, fuzz), modulation (chorus, phaser, tremolo), time-based effects (delay, reverb), and utilities such as a tuner, volume pedal, boost or noise gate. Some players also build their own pedals from kits or bare circuit boards, which we cover in DIY Pedal Kits and Mods.
The power supply. One supply feeding every pedal, sized to the pedals' voltage and current needs. Powering a board is a big enough subject to have its own page: see How to Power a Pedalboard.
The cables. Short patch cables between pedals, longer instrument cables to and from the guitar and amp, and power cabling from the supply to each pedal. Cable quality and length matter for both noise and tone, which we come back to under common problems.
Powering the pedals
The single most common upgrade on any board is the power supply, because power problems show up as noise. General Guitar Gadgets' JD Sleep puts it plainly8126:
"The main problem is hum and buzz noise added to the audio signal in some pedals or situations. Make sure the power supply is well filtered and regulated."8
He learned this the hard way, twice: background noise on his pedalboard at a studio turned out to be unfiltered power, and a ground loop problem appeared in his rack at a gig using an unfamiliar PA system8.
The usual solution is an isolated supply. Voodoo Lab's power supply guide explains what isolation buys you:
"True isolation effectively gives every pedal on your board its own dedicated power source."6
With isolation, noise on one pedal's power line does not travel to the others through a shared ground. Voodoo Lab's guide names its Pedal Power 3 Plus, Pedal Power 3, Pedal Power X4 and X8 as examples of isolated pedalboard power supplies6. A real-world example of getting power right: the Alain Johannes Eleven Pedalboard, handmade by Dr. No for Alain Johannes' live shows, is powered by two Voodoo Lab power supplies, with every effect powered by isolated power plugs at the right currents13.
Two power details worth checking before you buy a supply:
- Voltage. Most pedals run on 9V DC, but not all. MI Audio notes a customer build running off a 12VDC supply because the tube boost circuit requires a minimum of 12VDC to operate efficiently14. Check each pedal's requirement and match it.
- Current. Every pedal draws a stated current, and the supply's outputs must cover the total. Digital pedals typically draw more than analog ones.
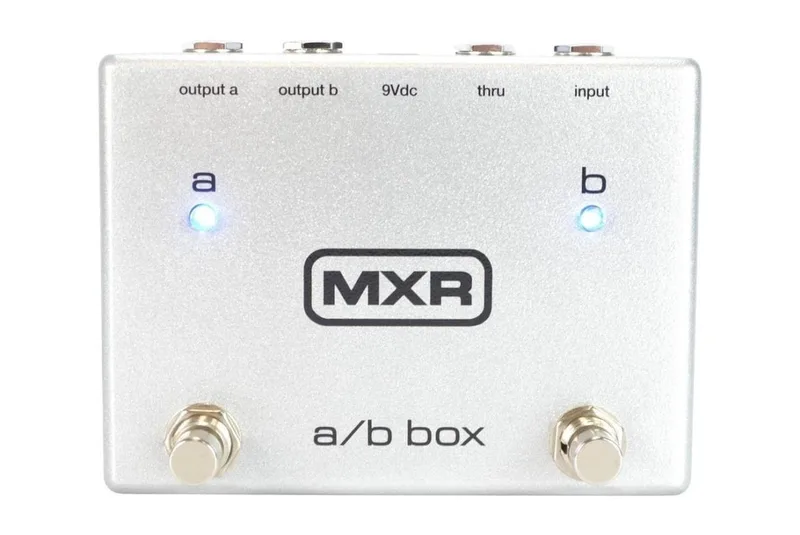
Some pedals also run on batteries. Dunlop lists the MXR A/B Box as powered by a 9-volt battery, a Dunlop ECB003 9-volt adapter, or the DC Brick, Iso-Brick and Mini Iso-Brick supplies15. For more depth, see How to Power a Pedalboard.
Signal chain order
The order of pedals in the chain shapes the sound as much as the pedals themselves. Voodoo Lab's switching system guide gives a working rule:
"Place 'dry' pedals (drives, fuzz, compressors) in the early loops and 'wet' effects (delays, reverbs) in the later loops."7
In practice that means gain pedals and compressors see the guitar's raw signal first, and time-based effects last, so delays and reverbs process an already-shaped sound rather than being distorted themselves. The full subject, including where tuners, filters and volume pedals fit, is on our Pedal Signal Chain Order page.
Order is also something you can experiment with. GuitarPCB's Beano Bundle, a DIY build document, includes an Order switch that selects the signal order of its two circuits, so a builder can flip which effect comes first without rewiring16. That same idea applies to any board: if two pedals sound better swapped, swap them.
Laying out and mounting
Layout follows function. The pedals you step on most, typically drives and boosts, go in the front row where your foot reaches them easily. Pedals you set once and leave, such as a compressor or a noise gate, can sit at the back. Keep the chain order in mind as you place them, because the patch cables have to run from one pedal's output to the next pedal's input without crossing the whole board.
A few practical points from the sources:
- Plan it first. A free planner tool such as Pedalplayground lets you arrange pedals on screen before you drill or tape anything11.
- Mounting. Hook-and-loop tape is the standard. The GigRig recommends using pedalboard tape to attach its More Or Less switcher to a Loop Velcro or a dry flat surface17. Boards with slotted rails or holes also take zip ties, which suit pedals you swap often.
- Leave room to grow. Daniel's homemade board was specifically designed with room for particular pedals3, and a board with a little spare space saves you rebuilding it after the next purchase.
MIDI and switching systems
Once a board grows past a handful of pedals, true bypass switching and MIDI control solve two problems: tap dancing, and the tone loss and noise that come from chaining many pedals in series all the time.
A loop switcher acts as the traffic controller for the whole board. Voodoo Lab's guide describes the benefit:
"If a pedal isn't active, the switcher ensures that it, and the cables connecting it, literally don't exist in your signal path."7
Each pedal lives in its own loop, and the switcher brings loops in and out. Pedals that are off are completely removed, along with their patch cables, instead of sitting in the chain loading the signal.
MIDI takes this further for digital pedals. Voodoo Lab's advice is to assign each digital pedal its own MIDI channel, for example delay on channel 1 and reverb on channel 2, so the controller can send different instructions to each pedal simultaneously7. MIDI modules can also be built into individual pedals: Microdesignum sells a small MIDI module kit for guitar pedals with one footswitch and a 4PDT relay, with the MIDI channel set by DIP switches18.
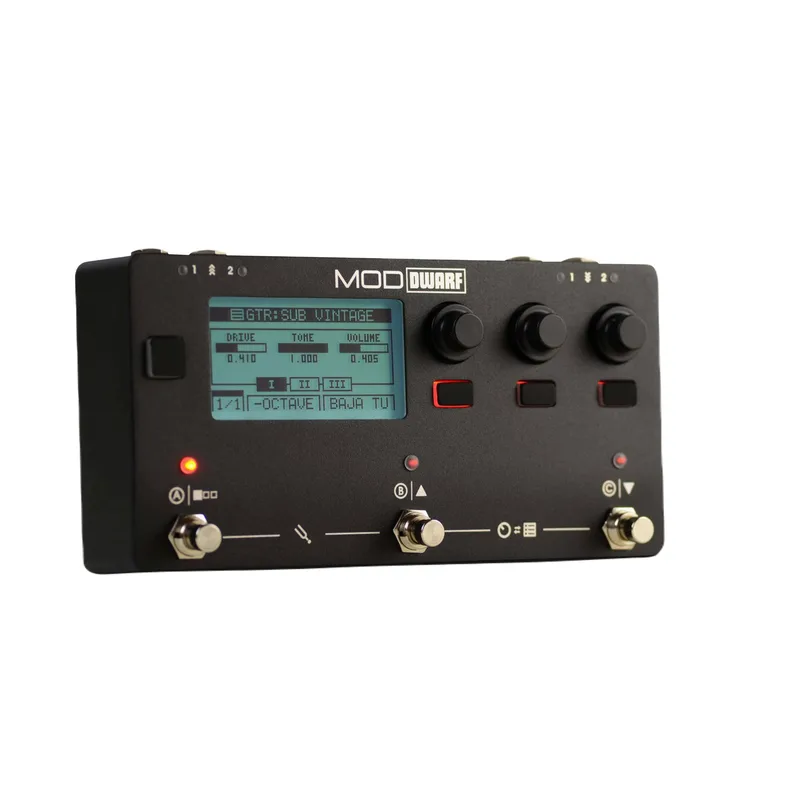
At the far end of this path are complete custom systems. Microdesignum builds custom MIDI pedalboard and rack systems as full replacements for classic pedalboards full of individual boxes, with the pedalboard and rack connected by one durable multipair cable with a very robust connector19. A 2013 example build had Microdesignum supply the pedalboard control electronics, power supply and power distribution, a single-cable connection carrying guitar signal, MIDI, power and booster control, and remote control built into a guitar booster19. Software-based boards take the idea further still: the MOD Dwarf offers a browser-based graphical interface for building and saving pedalboard setups when connected to a computer20. See MIDI Switching for Pedals for the full picture.
Common problems: noise, tone loss and power issues
Hum and buzz. The first suspect is always power. Use a supply that is well filtered and regulated, and prefer isolated outputs, since most wall warts are not filtered to that standard8. Ground loops, which JD Sleep hit at a gig through an unfamiliar PA system, are the second suspect8. A noise reduction pedal is the last line of defense: NUX's Huminator is engineered to tackle noise issues, from hum and buzz to pedalboard interference10.
Tone loss. Long cable runs and many true-bypass pedals in series can dull high end. The fix is a buffer, a small circuit that drives the signal through the cable run. Bright Onion Pedals describes its Micro Buffer Pedal as a buffer "to liven up your pedalboard"9. Where buffers sit in the chain, and how they interact with true bypass, is covered in True Bypass and Buffers.
Rework pain. Once a board is taped down, trying a new pedal in the middle of the chain means re-routing. Patch bays solve this. American Loopers' 6-way junction box with two audition loops lets you audition pedals in the chain without changing cables: connect the pedal's inputs to the box, and pulling the cables re-routes to bypass mode21. If your looper has an insert, you can put pedals in and out of the insert without re-routing the pedalboard or making new cables21.
Feedback loops. Some pedals are designed to sit in a loop of their own. The JHS Feedback Looper is wired with the guitar in the input, the amp in the output, and anything you want in the send and return loop connections22.
Building pedals to go on the board
A board is also a good home for pedals you built yourself. Makers sell bare circuit boards and full kits at every level:
| Maker | What you get |
|---|---|
| PedalPCB | DIY PCBs such as the Episode Booster, Pauper, Revel Overdrive and Virile Boost23242526 |
| Jed's Pedals | Kits with PCB, onboard components, pots and toggle switches; the off-board parts option adds foot switch, jacks, 9V socket and LED272829 |
| MAS Effects | The DIY Pedal Tower, with all hardware, PCBs and parts included; you solder and assemble it30 |
| GuitarPCB | PCBs with build documents, 3PDT wiring boards and combo-building pads31 |
VFE Pedals even publishes DIY-friendly designs used in a class where students build pedals and perform songs in a band at a live venue32. And a board can change what your rig is: ENGL describes its Cabloader pedal as a way to "transform your pedalboard into a full DI rig"33, taking the board straight to a mixing desk without an amp.
Pedals on this page
Questions
What order should guitar pedals go in?
A common approach is to put dry pedals such as drives, fuzz and compressors early in the chain, and wet effects such as delay and reverb later. Voodoo Lab's switching guide states this plainly: place dry pedals in the early loops and wet effects in the later loops. A switching system keeps that order fixed so you never re-patch cables mid-gig.
Do I need an isolated power supply for my pedals?
Not strictly, but isolation solves real problems. Voodoo Lab describes true isolation as giving every pedal its own dedicated power source, which stops noise jumping between pedals. Unfiltered or shared power is a common cause of hum and buzz. Many wall warts are not well filtered and regulated, so an isolated supply is the usual fix.
How do I stop my pedalboard from humming?
Start with power. Hum and buzz often come from unfiltered power supplies or ground loops, which can appear when you plug into an unfamiliar PA system. Use a well filtered and regulated supply, and isolation between outputs. A noise reduction pedal such as the NUX Huminator is built to tackle hum, buzz and pedalboard interference.
Should I use velcro or zip ties on a pedalboard?
Hook-and-loop tape is the standard method. The GigRig recommends pedalboard tape to attach its More Or Less switcher to a Loop Velcro surface or a dry flat surface. Zip ties work on boards with slotted rails or holes, and they suit pedals you want to remove without peeling tape off the base.
Where does a looper go in the signal chain?
A loop switcher sits between your guitar and amp, with individual pedals wired into its send and return loops. Because it acts as a gatekeeper, an inactive pedal and its cables are taken out of the signal path entirely. Dry pedals go in the early loops and wet effects in the later ones.
Do I need a buffer on my pedalboard?
If long cables or many true-bypass pedals are dulling your tone, a buffer can help. Bright Onion Pedals describes its Micro Buffer as a way to liven up a pedalboard. Buffers are usually placed early in the chain, or after a group of true-bypass pedals, to drive the signal through the rest of the cable run.
Sources (33)
- Dave Navarro, Stompbox Book, 2019-06-02
- Pedalboard Feature: Boy & Bear's Killian Gavin, Strymon (www.strymon.net), 2014-06-03
- Readers' Pedalboards #14 An "Origin Journey", Origin Effects, 2018-07-06
- Forvis Light FP+TC Series|Products 商品紹介|Free The Tone, Free The Tone
- Big Pedalboard with powersupply, GOKKO AUDIO (gokkoaudio.com)
- The Complete Guide to Powering Your Pedalboard, Voodoo Lab, 2026-06-24
- Guitar Effects Switching System Guide, Voodoo Lab, 2026-06-24
- How to Add a 9V Power Jack to a Guitar Pedal, generalguitargadgets.com, 2014-05-22
- Micro Buffer Pedal, Bright Onion Pedals
- HUMINATOR, NUX Audio, 2026-04-14
- How to Use Pedalplayground to Plan Your Perfect Pedalboard Layout, Aclam Guitars, 2024-10-22
- Master Effects Pedals | Power Supply Information, Master Effects Pedals
- The Alain Johannes Eleven Pedalboard, Dr. No effects webshop, 2024-03-12
- MI DIY Kits, MI Audio
- MXR® A/B BOX, Dunlop (jimdunlop.com)
- Beano-Bundle-Build-Document.pdf, GuitarPCB, 2024-05
- The GigRig, TheGigRig (www.thegigrig.com)
- Universal MIDI module for pedals with footswitch and a 4PDT relay, Microdesignum.cz
- Systém MIDI pedalboard, Microdesignum
- What happens when you cross an effects pedal with a computer?, MOD Audio (mod.audio), 2021-04-19
- 6 Way Junction Box With Two Audition Loops, American Loopers (www.americanloopers.com)
- FEEDBACK LOOPER HAND PAINT, JHS Pedals
- Episode Booster, PedalPCB.com
- Pauper - PedalPCB.com, PedalPCB.com
- Revel Overdrive, PedalPCB.com
- Virile Boost, PedalPCB.com
- Mon The | DIY Guitar Effects Pedal Kits, Jed's Pedals (jedspeds.co.uk)
- Gekyume | DIY Guitar Effects Pedal Kits, Jed's Pedals (jedspeds.co.uk)
- Katzenkonig, Jed's Pedals
- Prototyping and testing rig for DIY guitar pedals, MAS Effects
- SRIRACHA FUZZ, GuitarPCB.com, 2023
- File Dump, VFE Pedals
- Engl Cabloader, ENGL Amplification, 2026-04-22